Last week, I made a couple of updates to Hack Education:
- I refreshed some of the content on the Hack Education Ed-Tech Guide.
- I added a section with some details, including a partial bibliography and a chapter outline, about my forthcoming book Teaching Machines.
Both of these sections exist as – and the pages are run off of – GitHub repositories.
Why (I Hope) GitHub Works
I’ve opted to use GitHub, a site known best for hosting open source code, because I want to solicit feedback on both of my projects. I want the data – bibliographies mostly – to be openly accessible; I want comments; I’d love to see the resources expanded and/or forked; I want to encourage contribution and feedback. GitHub isn’t the perfect place for that, I do realize. (I ran into all sorts of problems, for example, when I put the Learners’ Bill of Rights there.)
But I’m also using GitHub because (thanks to Kin) I’ve found it to be an incredibly simple way to create pages for my sites.
How to Run Your Site Off of GitHub
1. Register your domain.
I use Hover for this. (Never ever ever use GoDaddy. It is evil.) You can also use this step to set up a subdomain on a domain you already own.
2. Create your repository at GitHub.

Make sure to initialize the repo with a README file. Then, once the repository has been created, go to Settings.
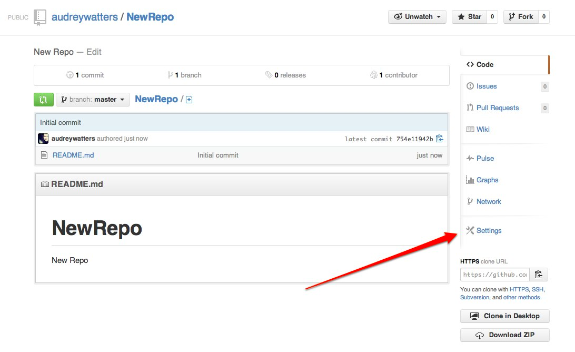
Scroll down to the GitHub Pages section and click on the “Automatic Page Generator” button.

A GitHub Page will be generated, full of sample Markdown text (that you can freely delete here).

Click on the “Continue to Layouts” button, where you’ll be asked to choose a template. You can change the CSS on your site later, so just pick an interim “look” for your Page. Hit “Publish.”

3. Clone the repository to your desktop

If you haven’t already, download the native app for GitHub (Mac, Windows).
Once you link your account, you’ll be able to clone your GitHub repository to your desktop. Choose the folder where you want this to live. (I use “Documents.”)

4. Open the repo on your desktop and switch branches to gh-pages
Open the repository. Click on the “Branches” option on the left-hand menu. There you’ll see 2 branches: the master and gh-pages. If you hover your mouse to the left of the gh-pages branch, a check mark will appear. Click on that to switch to gh-pages (It will now appear on top.)
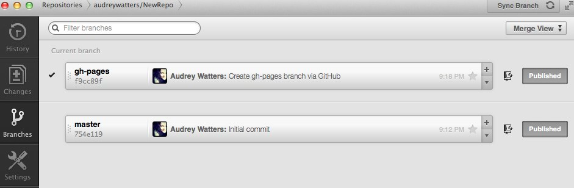
This means that edits you make locally to the repo will appear on gh-pages rather than on the master branch. (This is useful if you want to keep the master branch for other content. This is what I’m doing with my recent repos. It allows me to accept pull requests to the master without necessarily updating my site pages.)
5. Open files in your editor
I use Aptana for Web development. Navigate to the folder where you have your repo stored on your desktop. There you’ll find several subfolders – fonts, images, javascripts, stylesheets – and two files – index.html and params.json. Open index.html.

6. Edit index.html

When I added the Hack Education Ed-Tech Guide and the Teaching Machines GitHub repos to my site, I wanted to maintain the look of the rest of the blog. So I deleted all the contents of this auto-generated index.html file, then copied the style from the main Hack Education blog to index.html. (To do so, I went to a single blog entry and hit “View Source.” That allowed me to copy the header and the right-hand column of Hack Education. I then just had to edit part that contained the blog post content.)

Save your work.
7. Commit your changes

Once you’ve made the changes you want to index.html, you’ll need to go back to the GitHub app. Add a commit summary, hit “commit.” Then hit “sync.”

Don’t worry: sometimes it takes up to 10 minutes for changes to show up on your GitHub page.
8. Add additional HTML pages, if desired
You can use this same process to create additional HTML pages. For the Ed-Tech Guide, for example, I created techies.html and edu.html. I simply copied index.html to do so, then edited what I need to change.
Again, any changes you make locally will need to be synced with GitHub.
9. Create a CNAME file
Once you’re happy with how the new HTML looks, you can go about redirecting the site from GitHub’s hosting to your own domain.
To do so, go into the local folder and create a new file. Call it CNAME.
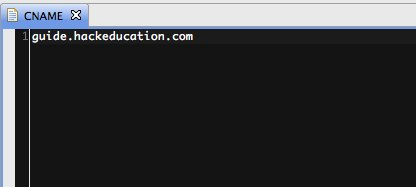
In the file, enter the domain or subdomain you plan to use. No http:// and no quotations.
Commit your changes. Sync with GitHub.
10. Edit DNS
The URL for your GitHub Page will look something like http://audreywatters.github.io/NewRepo. But you'll want to redirect that to your URL-of-choice.
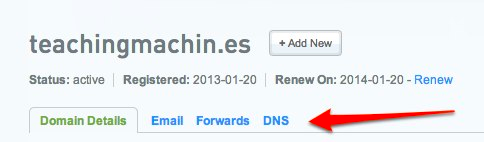
Go to your domain registry service. (Again, I use Hover.) Change the DNS of the domain (or subdomain) to 204.232.175.78. (I like to use Central Ops to check to make sure I've set up the DNS correctly before I actually try to load the page.)
GitHub Pages and Owning Your Own Domain
I think that GitHub Pages could make a great tool for teachers and students who are reluctant to undertake something like a WordPress install, and this is part of the larger effort that I’m committed to: folks owning their own domain.
This process makes it fairly easy to create a personal landing page, if nothing else. (Although yes, it does require some basic HTML knowledge.) You could also use this process to duplicate "the look and feel" of a blog you already have and use GitHub to host static pages, such as a CV or syllabi, as a subdomain.
Let me know if you have any questions. Like most walkthroughs, I'm sure I've neglected to write out all the steps clearly!